I dislike unhappy stories and enjoy writing about them even less. However, I have to remind myself that not everything is about the birds — Mother Nature is a much more clever scriptwriter than that.
I mentioned in my last post that there were some moving specks on the vinyl siding behind the nest that I suspected might be some kind of bird mite. Here is what my research found.
At the end I share my opinions as to the effect that the mites had on the nestling development and their departure from the nest.
Visual Evidence of Mites
I went back and looked at video footage to look for evidence of moving specks which I would later confirm to be mites. It turns out that a good way to see them is to fast-forward the video and watch closely — the mites are easy to see when moving, especially those on the light coloured vinyl siding.
I found the first mite evidence in the July 19 webcam footage — (hatch-day + 8). On subsequent days, the quantity of mites increasing dramatically, dare I say ‘exponentially’, until the three nestlings left the nest on July 23. While the initial mites were only seen while moving on the vinyl siding, by July 21 large immobile clusters of mites could be seen on the outdoor light fixture. Here is a picture taken on July 22 with my Panasonic FX-200 camera:
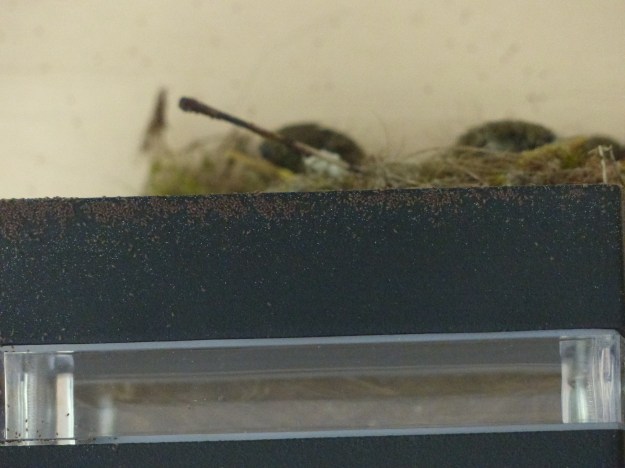
Mites grouping on the outdoor light fixture.
The out-of-focus mites are still visible on the siding behind the nest. More obvious are the the brown patches on the black edge of the light fixture in which individual mites are easily visible. The reddish-brown colour comes from mites that have all taken some blood, probably from one of the nestlings (’empty’ unfed mites are light coloured).
To study the mites more closely, I ran a lint roller along the edge of the light fixture. This was surprisingly effective at removing all of the mites in its path. The sticky lint-roller paper immobilized most of the mites however there were still a number of wandering mites so I sprayed the sample with a mixture of bleach and water to make sure the mites were dead before the sample came into the house.
To demonstrate the mite size and numbers, I took a picture showing a section of lint-roller paper with mites next to a Canadian dime:
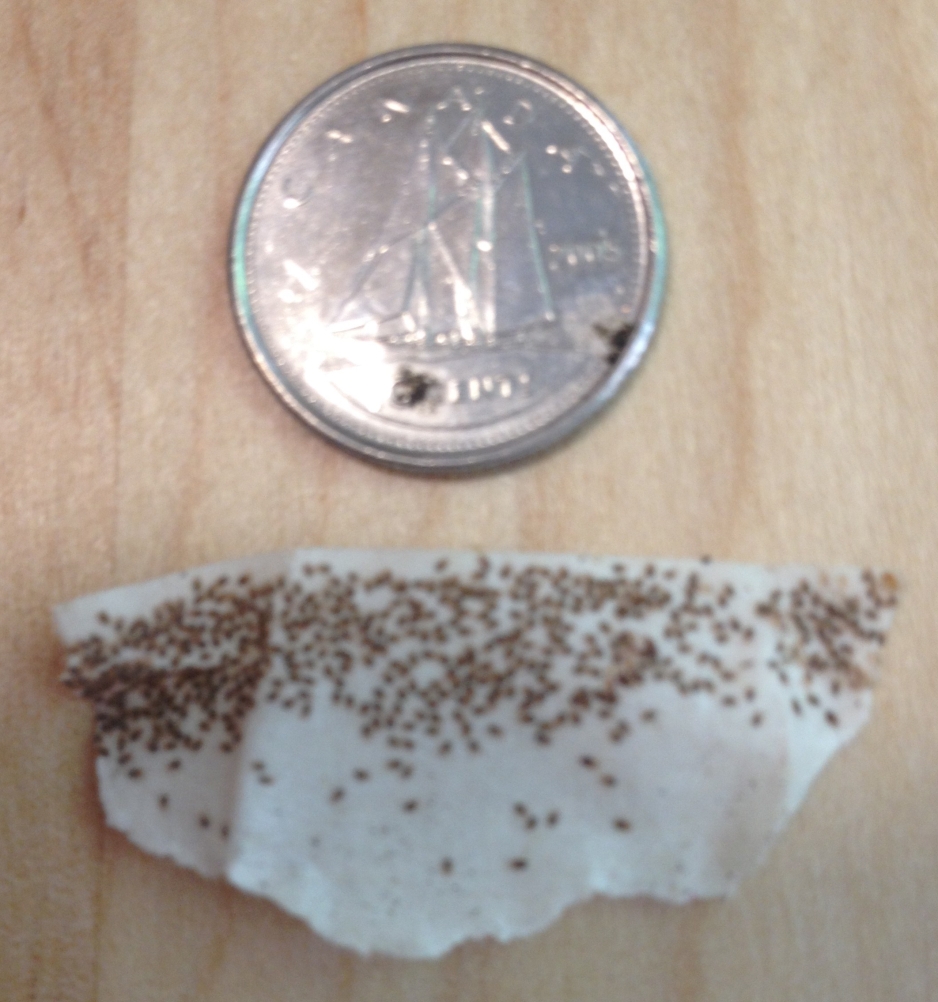
Mite sample acquired using a lint roller.
A dime is about 1.8 cm in diameter so I estimate the density of mites in the high-density area along the top of the sample to be about 200 per square centimetre. After the nestlings had left the nest, there was extensive coverage of the light as well as 4 or 5 patches of packed mites on the siding. Estimating the visible coverage at around 200 square centimetres that would mean about 40,000 mites. This is just the visible areas and the hidden areas on the light fixture. Any mites on the nest or the nestlings are not included though one might expect both to be heavily infected. My best estimate for the total mite count is somewhere between 50,000 and over 100,000.
We have a Wild M11 microscope which I used to get a better look at the mites. Using my iPhone camera, I was able to take some surprisingly good pictures. The following image was taken at the lowest (4X) magnification:

The wire has a length of about 2.2 mm at this magnification (calibrated with a plastic ruler) making the mites’ length about 0.6 mm. The next image was made at the next highest magnification (10X). Unfed mites are clear so this looks like a mite that has fed on blood — nestling blood most likely.

Identification
The two most common North American bird mites are the Northern Fowl Mite (Ornithonyssus sylviarum) and the Chicken Mite (Dermanyssus gallinae) which goes by several other names such as the Red Mite, Red Fowl Mite and Red Poultry Mite. Both are of great interest to the poultry industry because of the costly damage they can do. Both can infect wild bird species. From various sources I have read, I concluded that the flycatcher nest was probably infected with the Northern Fowl Mite.
The best reference that I found summarizing issues around bird mites and humans comes from a 2010 document from the PennState, Department of Entomology series of short Entomological Notes simply titled BIRD MITES (accessed July 28, 2017). Below, I quote a few of the more relevant paragraphs and highlight important sections that helped me handle the flycatcher mite infestation:
Bird mites are very tiny, flattened parasitic arthropods in the order Acari. They belong to two closely related genera in two families; Dermanyssus species in Dermanyssidae (Fig. 1), and Ornithonyssus species in Macronyssidae. Bird mites have piercing mouthparts that enable them to take blood meals from their bird hosts. Although the mites will inadvertently bite people, they cannot reproduce without their bird hosts.
DESCRIPTION
Bird mites have five stages: egg, larva, protonymph, deutonymph and adult. The larvae have three pair of legs; the nymphs and adults have four pair. Adults are about 0.7 to 1 mm in length and are just barely visible to the naked eye. Unless they are moving, they are extremely difficult to see. The color is translucent white until they take a blood meal after which the mites are reddish mahogany to brown. Mite eggs are white, oval and cannot be seen without the aid of magnification. The same applies to the larvae and nymphs.
LIFE HISTORY/BEHAVIOR
Most bird mite species can complete development in five to twelve days with optimal temperatures and host presence. This short life cycle makes it is possible for mite populations to attain tens of thousands of mites in bird nests during the rearing of young birds. If the population is too large (or if the fledglings vacate the nest or perish), the mites will migrate in mass to locate an alternative host. It is during this migration that mites can and do enter the living quarters of people. Some mites (i.e. Dermanyssus gallinae, the chicken mite) can survive for several months without taking a blood meal; the northern fowl mite, Ornithonyssus sylviarum, for several weeks. However, the mites do not appear to survive for more than several days in the reduced humidity (<35%) environs typically found in air-conditioned or dehumidified homes.
…
MANAGEMENT
Birds should be discouraged from building nests in or adjacent to buildings. Close all openings large enough for birds to enter attics, sof ts and similar areas. Install hardware cloth, sheet metal, or other materials to prevent birds from nesting and roosting on porches, breezeways and other exterior sites. Disrupt nest-building efforts by removing partially completed nests in shrubbery and on air conditioners and windowsills.
If mites are detected in the structure, locate the bird nest source. Remove the nest.
…
My take home message was to monitor the mites both around and away from the nest and be prepared to remove the nest and sanitize the nest area once the nestlings had left the nest to prevent the host-less mites from moving inside the house looking for new targets. I read some accounts of the problems that resulted from houses that became infected by bird mites (readily available on the websites of many extermination companies) and they definitely made me want to keep the mites outside.
Of Mites and Nestlings
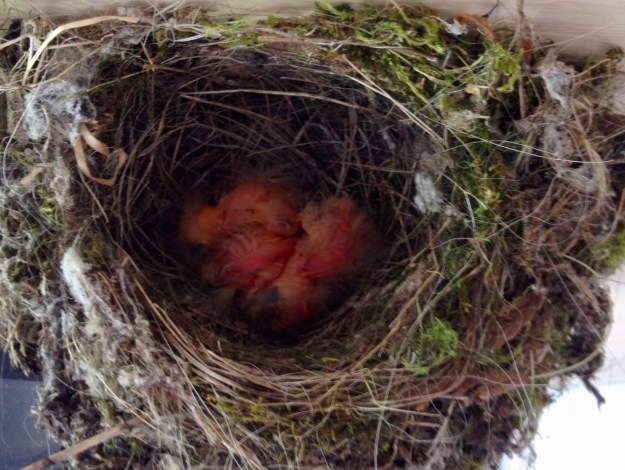
Beside the visual evidence of an exploding mite population, the nestlings became increasingly restless as the quantity of mites increased. Frequent episodes of scratching were noticeable on the webcam videos.
My personal belief is that the nestlings left the nest early, before the were ready to fledge, in large part because of their discomfort from the mites. I know that one nestling perished because I found the body on the morning of July 24. The last sighting of a nestling was on the morning of July 25. The last sighting of the female adult sticking close to its foraging area near our house was on July 25.
One final reason why I do not think that there were any surviving nestlings was the presence of a domestic cat nearby. The day that I found the dead nestling, it was lying in our driveway when I returned home from some errands. I have seen the cat, before and since, in and around our yard. An unfledged nestling hopping in the bushes would have had little chance of avoiding the feline if it were spotted.
References


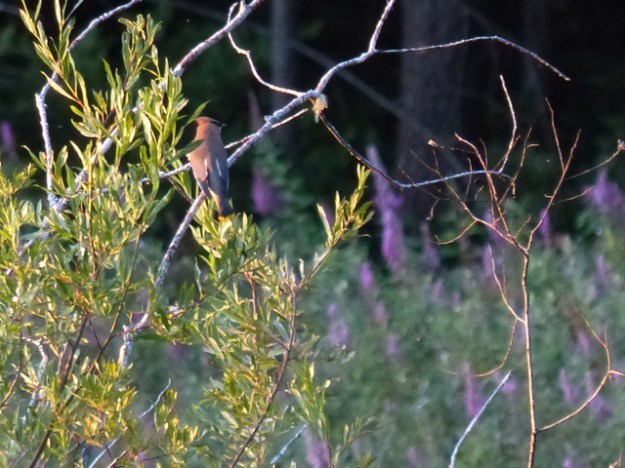
 The glowing areas are some bushes catching the last daylight. The glow is also attracting lots of flying insects. The Cedar Waxwings were attracted to these insects and were making short excursions from nearby perches to fly-catch.
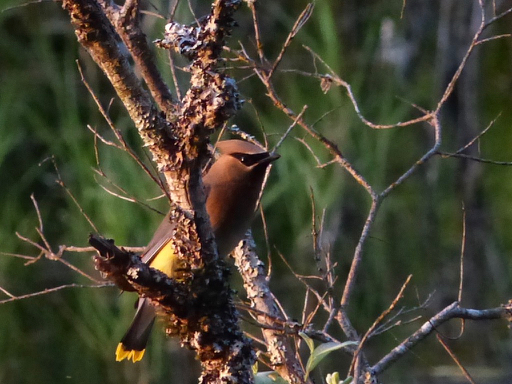